This is called an Image Map and when you are finished creating one, users can click on your image and it will take them to whatever page or site you have specified!
1. Find the page with the picture you want to map and make sure you're in Edit mode! The Edit button will be blue.

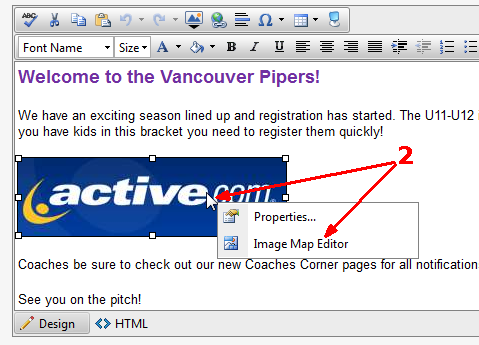
2. Edit the page content area that contains the picture, right-click while on top of the image and click on Image Map Editor.

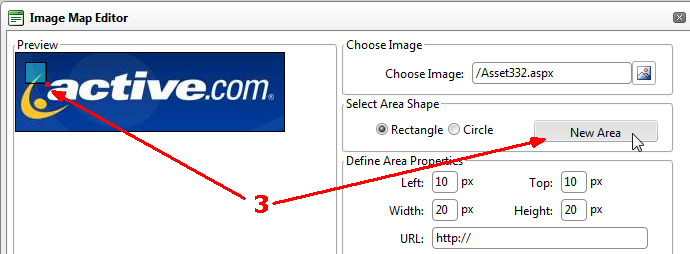
3. When the Image Map Editor is displayed, click New Area. This is so you can indicate what part of the picture (usually all of it) is clickable.

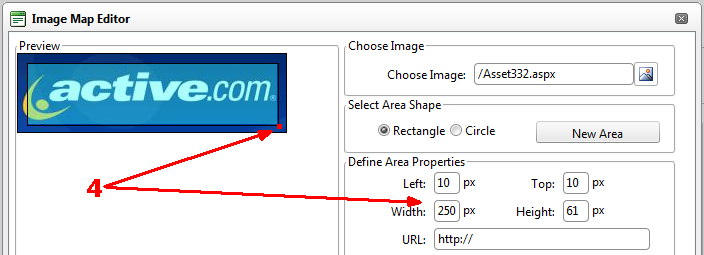
4. Click on the little red corner icon and drag the mouse so that the pale blue box covers the whole image and then click the mouse again. You will see that the Left/Top/Width/Height boxes reflect the new size of the image map in pixels.

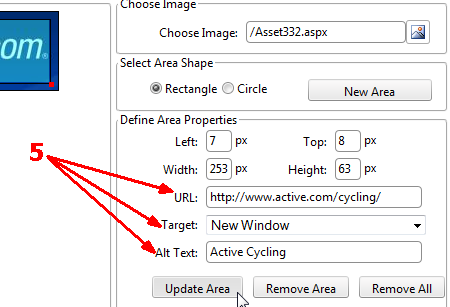
5. Now you must type in a URL to jump to when the user clicks on the image. You can also indicate if you want the new location to open in a new window or in the same one. If you want to add Alt text you can but it's not required (Alt text is displayed when a user mouses over the image, showing them what it's all about)!

6. Click OK to save and then remember to click Publish!
Once you've published your page, try clicking on the picture and see if you jump to the new location!